
Categories
Archives
- March 2022 (10)
- November 2021 (9)
- October 2021 (10)
- January 2021 (5)
- November 2020 (6)
- August 2020 (2)
- June 2020 (9)
- May 2020 (4)
- April 2020 (7)
- March 2020 (4)
- January 2020 (6)
- October 2019 (4)
- August 2019 (3)
- July 2019 (2)
- June 2019 (4)
- May 2019 (3)
- April 2019 (15)
- February 2019 (1)
- January 2019 (5)
- November 2018 (8)
- August 2018 (10)
- July 2018 (4)
- May 2018 (23)
- April 2018 (4)
- March 2018 (4)
- February 2018 (1)
- January 2018 (5)
- October 2017 (1)
- September 2017 (6)
- July 2017 (8)
- May 2017 (11)
- February 2017 (1)
- January 2017 (6)
- November 2016 (5)
- August 2016 (8)
- June 2016 (9)
- May 2016 (9)
- March 2016 (2)
- December 2015 (7)
- November 2015 (1)
- October 2015 (5)
- August 2015 (8)
- July 2015 (3)
- June 2015 (2)
- May 2015 (14)
- April 2015 (5)
- March 2015 (13)
- February 2015 (5)
- January 2015 (14)
- December 2014 (1)
- November 2014 (9)
- October 2014 (4)
- September 2014 (12)
- August 2014 (13)
- July 2014 (10)
- June 2014 (4)
- May 2014 (9)
- April 2014 (3)
- March 2014 (3)
- February 2014 (7)
- January 2014 (2)
- December 2013 (2)
- November 2013 (4)
- October 2013 (12)
- September 2013 (14)
- August 2013 (10)
- July 2013 (6)
- June 2013 (11)
- May 2013 (12)
- April 2013 (1)
- March 2013 (6)
- February 2013 (7)
- January 2013 (4)
- December 2012 (6)
- November 2012 (4)
- October 2012 (2)
- September 2012 (5)
- July 2012 (8)
- June 2012 (3)
- May 2012 (12)
- April 2012 (4)
- March 2012 (7)
- February 2012 (4)
- January 2012 (1)
- December 2011 (9)
- November 2011 (10)
- October 2011 (10)
- September 2011 (4)
- August 2011 (8)
- July 2011 (28)
- June 2011 (5)
- May 2011 (7)
- April 2011 (3)
- March 2011 (6)
- February 2011 (10)
- January 2011 (7)
- December 2010 (13)
- November 2010 (10)
- October 2010 (10)
- September 2010 (12)
- August 2010 (4)
- July 2010 (16)
- June 2010 (3)
- May 2010 (7)
- April 2010 (3)
- March 2010 (3)
- February 2010 (12)
- January 2010 (5)
- December 2009 (11)
- November 2009 (14)
- October 2009 (19)
- September 2009 (8)
- August 2009 (15)
- July 2009 (14)
- June 2009 (8)
- May 2009 (6)
- April 2009 (8)
- March 2009 (8)
- February 2009 (11)
- January 2009 (12)
- December 2008 (13)
- November 2008 (23)
- October 2008 (10)
- September 2008 (11)
- August 2008 (13)
- July 2008 (10)
- June 2008 (9)
- May 2008 (6)
- April 2008 (4)
- March 2008 (2)
- January 2008 (3)
- December 2007 (9)
- November 2007 (3)
- October 2007 (3)
- September 2007 (1)
- July 2007 (8)
- June 2007 (11)
- May 2007 (13)
- April 2007 (10)
- March 2007 (15)
- February 2007 (1)
- January 2007 (15)
- December 2006 (8)
- November 2006 (9)
- October 2006 (24)
- September 2006 (4)
- August 2006 (6)
- July 2006 (6)
- June 2006 (8)
- May 2006 (18)
- April 2006 (9)
- March 2006 (8)
- February 2006 (10)
- January 2006 (8)
- December 2005 (8)
- November 2005 (12)
- October 2005 (19)
- September 2005 (13)
- August 2005 (15)
Category Archives: Electronics
Darth Fume Extractor
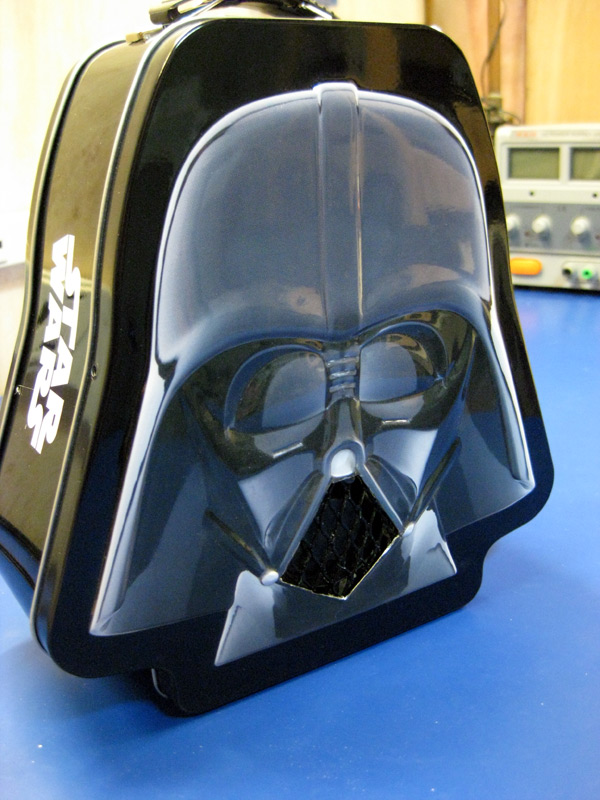
A few months ago, in an old issue of Make Magazine I saw instructions for building a soldering fume extractor, to keep you from breathing in the nasty fumes that solder produces when melted. In the article they built it all inside an Altoids mint tin, powered by a pair of 9V batteries. Then, a couple of weeks ago at a Michael's I saw a Darth Vader head lunchbox. I picked it up due to it's low price and high geek factor, assuming I would eventually think of something to do with it. Yesterday the two ideas came together - I cut out mouth of the Vader helmet, wired in a power regulator, switch, and a 12V fan, and built my own much cooler fume extractor. It works great, too!
Posted in Electronics
Comments Off on Darth Fume Extractor
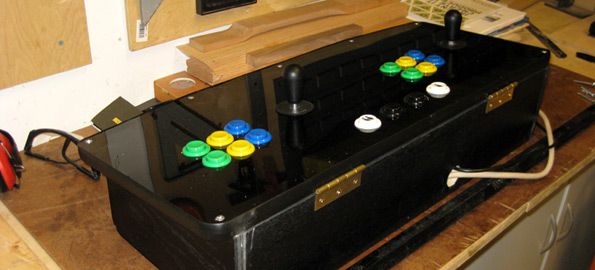
Photobooth Details
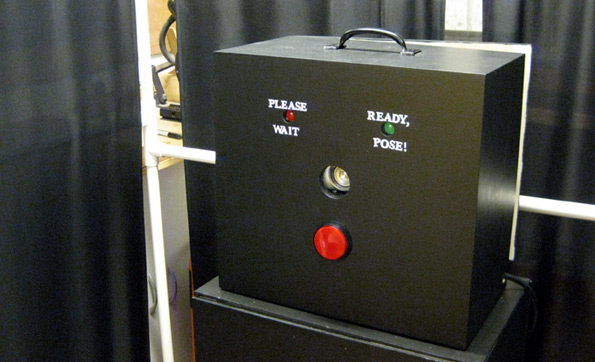
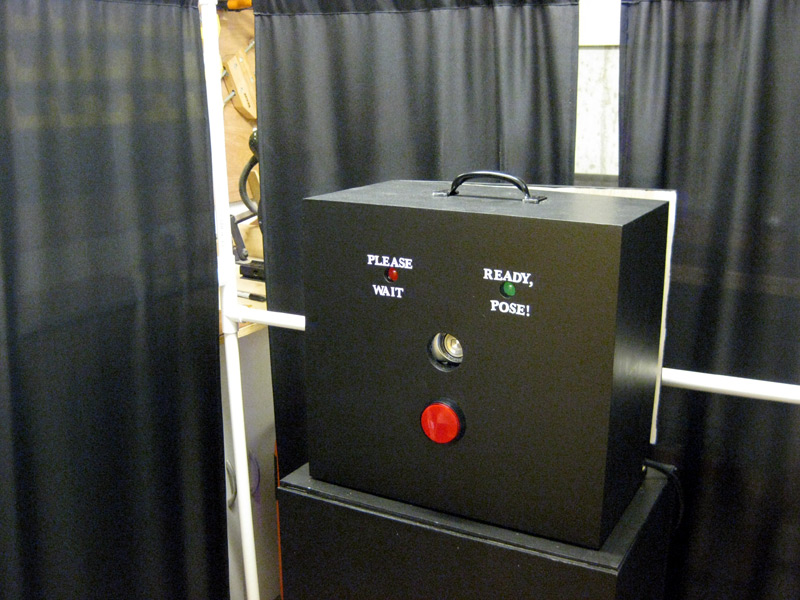
As promised, here are the details of the photobooth I built for our Father's Day Cookout. This first pic shows the photobooth box that houses all of the electronics. The big red button on the front lights up (even though it isn't lit in this picture). Once you push that, the green "pose" LED starts blinking - when it starts blinking fast, it's about to take a picture. Once all four shots have been taken, the red LED lights up during the assembly and printing process. One of the things I'd like to improve before next time is speeding up that assembly process - it seems to take too long. Also, I'd like to paint the box a little more interestingly. I ran out of time to do much besides a black satin paint job and some letter stickers - but once I get the enthusiasm to work on it again I'd like to do some kind of custom paint job on the box - maybe even try some silkscreening again.
I built the booth itself just from PVC and curtains - but I think I am going to make a few changes before I use it again. I need to make it a little taller, so that it isn't so hard to dial the camera in to exactly the right distance to not be able to see the top bar. Also, I'd like to come up with some system that will allow for multiple backdrops - and easy switching between them. This next picture shows the internals of the electronics box.

Here is what's inside:
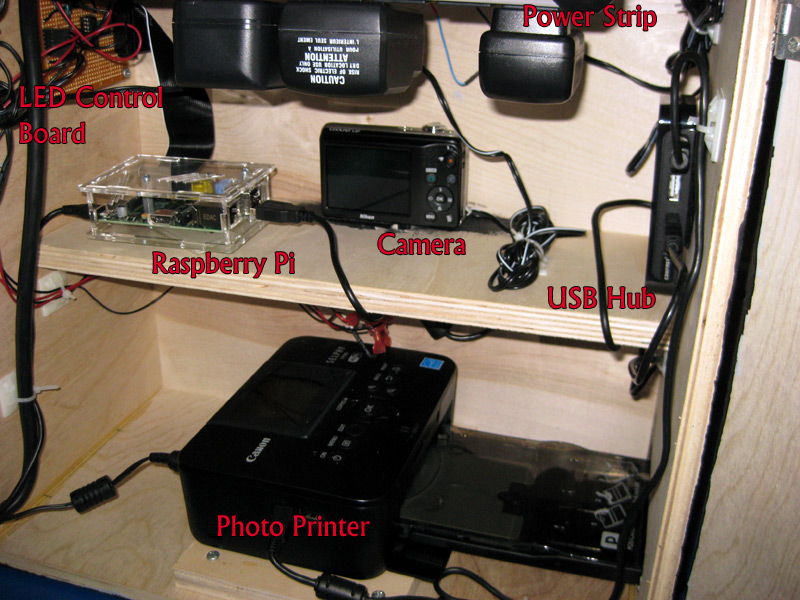
1) Raspberry Pi: The Raspberry Pi was configured per this instructable - Raspberry Pi Photobooth Controller. I had to do a few things differently than listed in the Instructable - mostly I had some Linux permissions problems, and I was never (so far) able to get the script to run successfully at startup.
2) Camera: The camera is controlled via USB, using the gphoto2 package under Linux. I camera doesn't have a DC input, so I make a 'fake' battery pack using some dowels and a DC adapter so that the camera could stay powered all the time. One annoying thing is that I can't adjust the flash or zoom settings on the camera while it is plugged into the Pi, but once you reconnect the camera to the Pi all the settings revert back to defaults. Which basically means I could never get the flash to stay disabled, and instead of zooming the camera I had to move the whole box closer to the chairs in the booth. Annoying - hopefully I will find a way to deal with this with a little more tweaking.
3) Photo Printer: Just a Canon Selphy photo printer - because that's what they had at Best Buy. Works pretty well, though. Only downside is the paper and ink cartridge need to replaced every 36 prints. Which means that if it were used more heavily at the party I would have needed to babysit it a lot more. As it was, it wasn't used as much as I had hoped, but that's mostly because I didn't do a good job of spreading the word that it was there to be used. Next time I will make sure everyone knows right from the start.
4) LED Control Board: I built a little LED control board for switching power for the big red button, plus the two status LEDs. This board connects to the GPIO pins of the Raspberry Pi.
5) USB Hub: The Raspberry Pi can't handle power-hungry peripherals on its USB ports, so you've typically got to connect up a powered USB hub.
6) Power Strip: Not much to say here - everything needed to be plugged in, so it made sense to include one. In the distant future it would be nice to rewire everything in here so that it can all be run off of a single power input to the box, and then regulated down for the individual devices. But I consider that a back-burner luxury for now.
Posted in Electronics
Comments Off on Photobooth Details
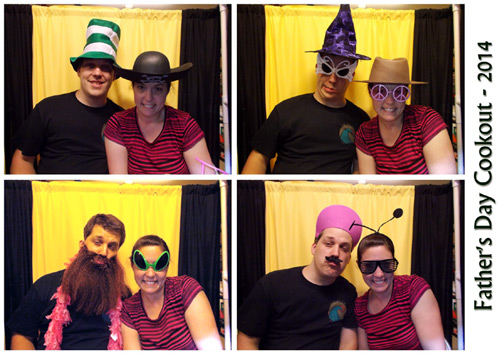
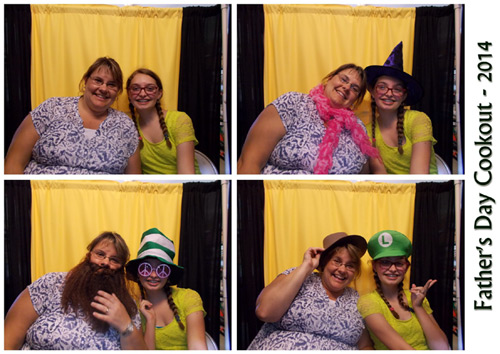
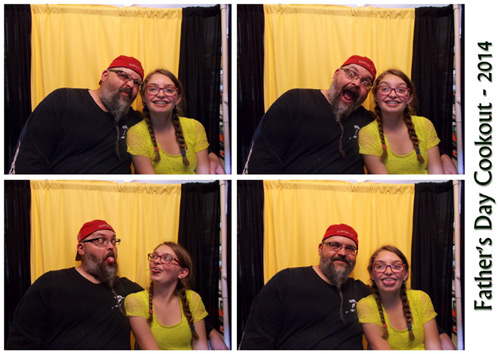
Photobooth Results
I built a Raspberry Pi-based photobooth in time for the Father's Day Cookout - I plan to show the technical details of the booth in the next post. But below are some of the photos it took. I've still got a few kinks to work out with the software, and I think next time I will use more light and a more neutral-colored background - this came out a little on the yellow side overall. But still, it was loads of fun! Everyone really seemed to love the bucket of props - I will have to find a lot more for next time!


Posted in Electronics
Comments Off on Photobooth Results
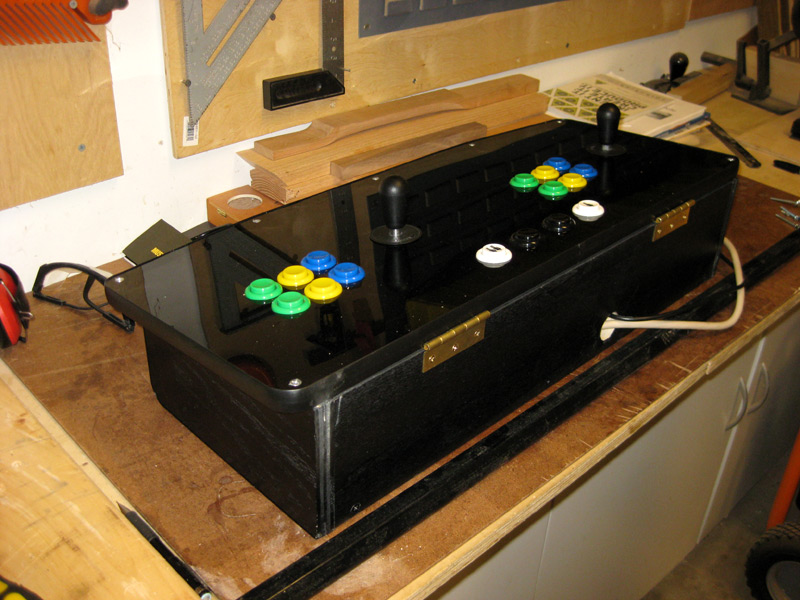
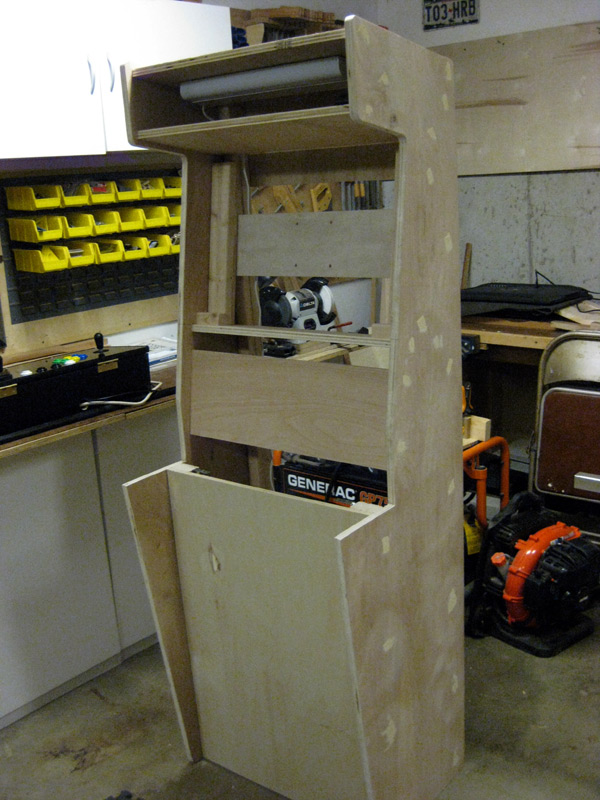
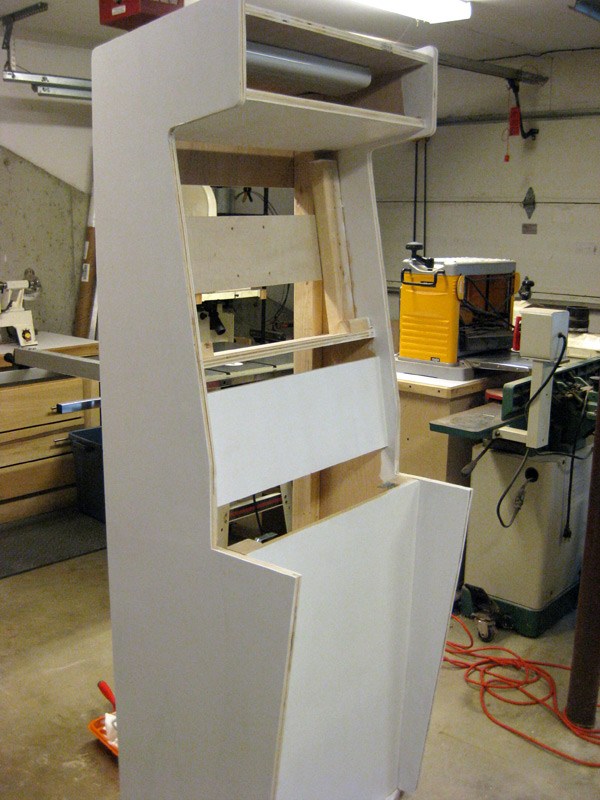
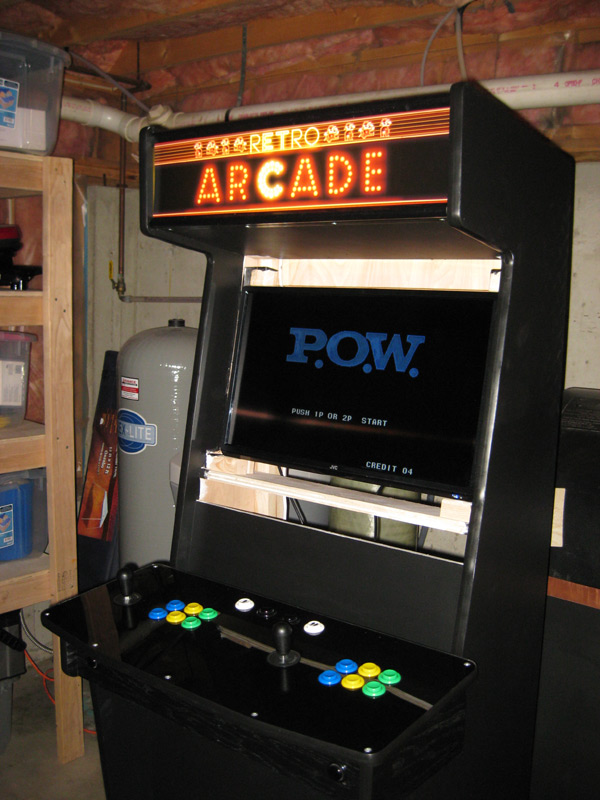
Arcade Cabinet
One of the first projects I tacked with my new workbench is something that I've been promising Sean for a long time - a stand-up arcade machine. We had one in Texas, but had no room for it in the new house and I had to get rid of it. Now with a modern LCD TV (as opposed to giant old-school tube) and a Raspberry Pi inside (rather than a full tower PC) I was able to build one both inexpensively and a lot lighter and shallower than the original. All it needs now is the bezel glass over the screen to hide the last of the wood, and then it will be done. I don't think we're going to bring it up to his room until after the cookout, though - I want to give everyone a chance to enjoy it before it goes upstairs.
Posted in Electronics
Comments Off on Arcade Cabinet
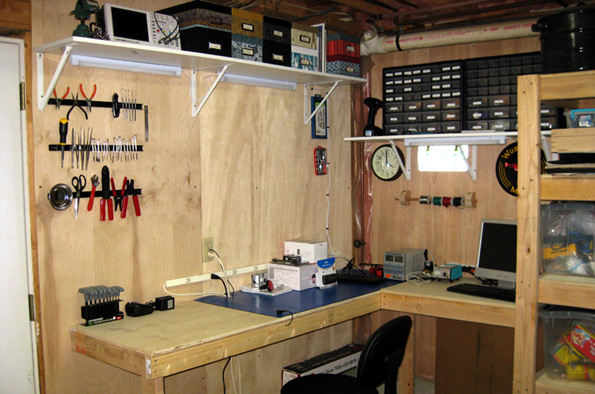
Tinkering Workbench
I needed another workbench that wasn't in the garage, that I could use for tinkering around with electronics projects. The problem is that the garage is too cold in the winter, and all the sawdust is bad for the type of stuff I'd like to work on. So I decided to build a workbench in the basement, and what you see below is the result.

Posted in Electronics
Comments Off on Tinkering Workbench
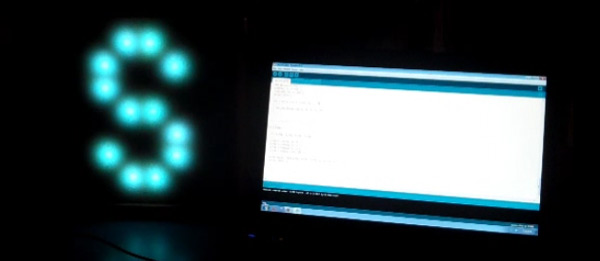
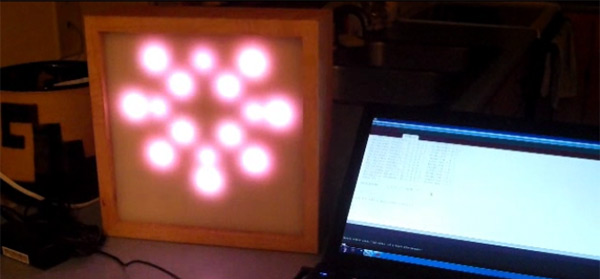
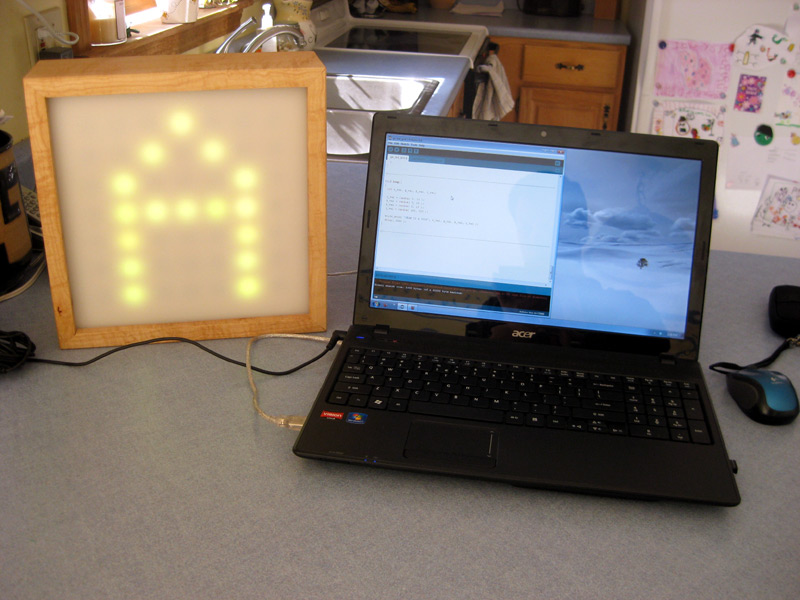
Light Grid: Software
This past weekend I also started working on the software to control the light grid. For now, I just tried some very simple things - rough versions of alphabetic character, and one very simple fireworks-style effect (both of which could be significantly improved. I've got lots more that I want to do, but this was a start just to give me an early fix of the awesomeness. :)
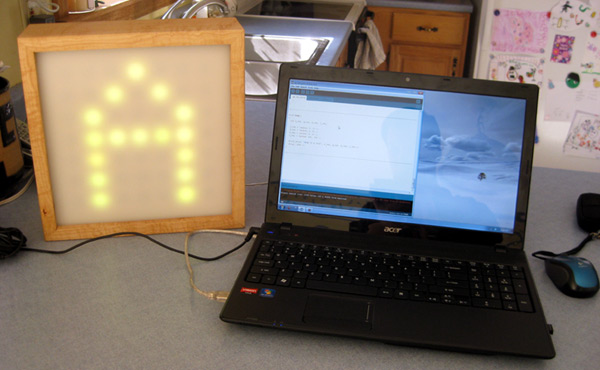
And below are a pair of short videos of each of the two things I mentioned. This first shows the letters - the example sentence I picked had Sean cracking up. The second shows the fireworks-style effect, which could use a lot of work - especially in the smoothing and fade-out department. I think I need to tail off the color values instead of trying to play with the brightness setting to get a better fade.
Posted in Electronics
Comments Off on Light Grid: Software
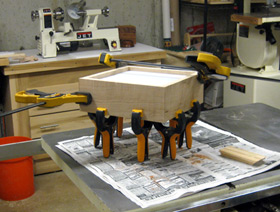
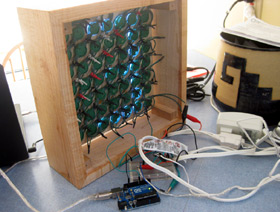
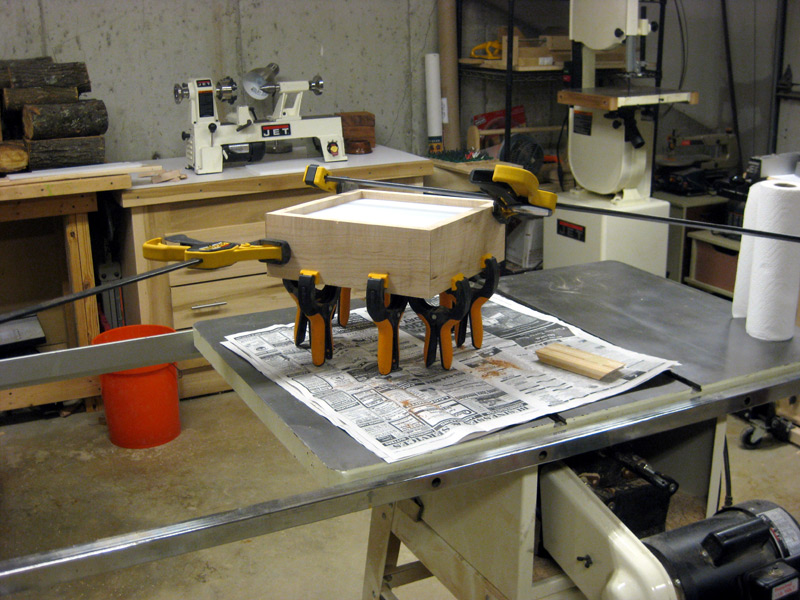
Light Grid: Enclosure
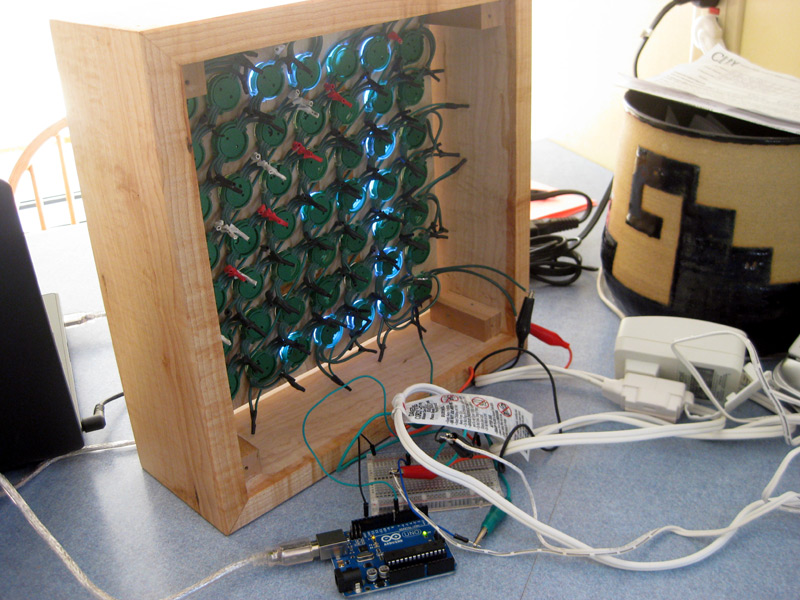
This past weekend I started working on the enclosure for the grid. I used some curly maple I'd had sitting around the shop for the last decade. :) It was a piece that has always been too small to make any furniture out of, but too nice to burn or throw away. So I made a nice little mitered box to hold the grid. For the diffuser to go in front of the LEDs, I borrowed an idea I saw online that actually ended up working perfectly - a white plastic cutting board. The enclosure got a coat of teak oil for a finish, which will later be followed up by some polyurethane - but I couldn't wait the three days for the oil to cure, so I mounted the grid in the enclosure to start playing around with it. In the right hand photo, you can see the enclose from the back (with the back panel removed). The Arduino is in the bottom center of the photo. Eventually, it will be mounted inside the enclosure as well, but I'm going to wait until after I get the polyurethane on before I mount it, just in case.
Posted in Electronics
Comments Off on Light Grid: Enclosure
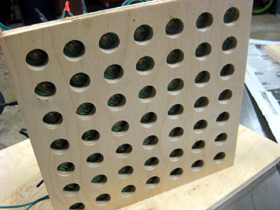
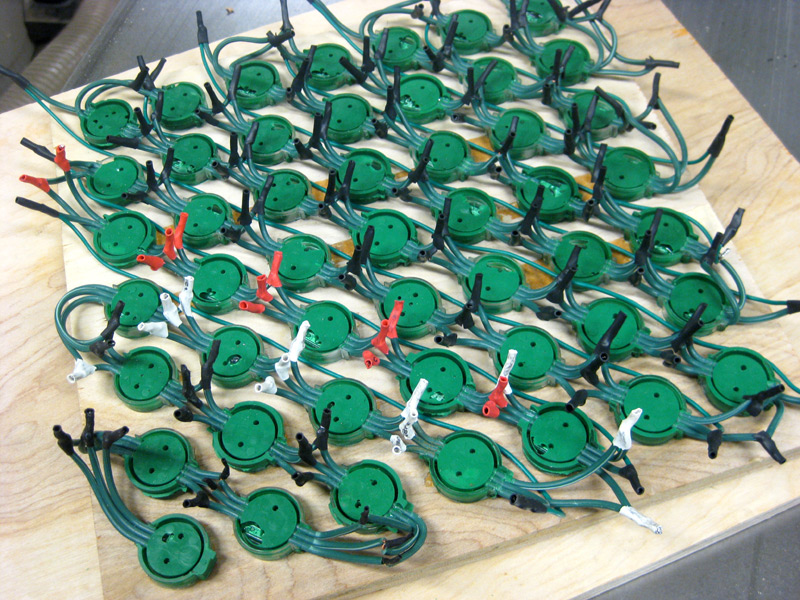
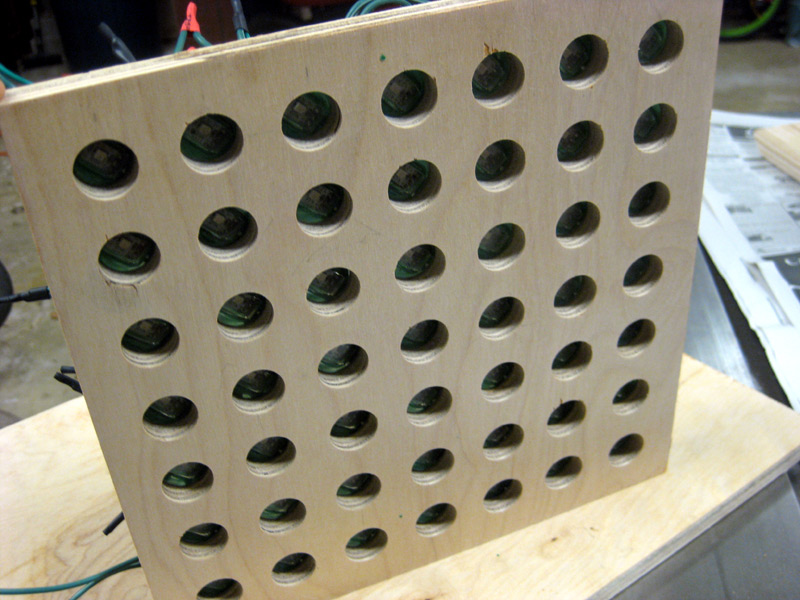
Light Grid: Making the Grid
The first step on my new project was to cut up the original string of Christmas lights, rip off the bulb covers and mounting tabs, mount them in a piece of plywood drilled with a grid of holes, and wire everything back up. This is what I worked on for a few hours each weekend in February. After a few mishaps and bad connections, I managed to hook it all back up to the original controller (that came with them) and a new, beefier power supply (that could drive both of the 25-light strings I had spliced together).

Posted in Electronics
Comments Off on Light Grid: Making the Grid
New Project: Light Grid
I've started a new project at home for fun. I've wanted to start playing around with an Arduino microcontroller for a while now. A few months ago, I came across several online projects (like this one and this one) involving using the Arduino to control a new style of Christmas lights made by GE. This Christmas lights are composed of a string of RGB (red-green-blue) LED modules that can be used to create any color of the rainbow. Each LED module on the string is individually controllable, and the stock remote that comes with the lights can only do a dozen or so patterns - and most of them are fairly boring. So - similar to the link I mentioned about - I want to cut up a string of modules and arrange them in a 7x7 grid, build a nice wooden enclosure for them, and display various pattens on the grid based on different events. For example, maybe I could make fireworks on the display when I receive an email. Stay tuned for future posts - I've actually gotten a little ways on this project, I just haven't gotten the photos together yet.
Posted in Electronics
Comments Off on New Project: Light Grid
HTPC Follow-Up
Well, it's been a few months since we started using the HTPC, and the verdict is in - we love it. It passed the wife-acceptance-test, which is the critical tipping point for any geeky husband to get one of his projects into the living room. It's funny though - we are using it differently than I had anticipated. Originally, I figured that the features we would use the most would be games (for me) and movies (for Lori). But it turns out that the feature that gets the heaviest workout is recording shows for the kids. We has actually turned out to be a lifesaver for our bedtime routine - I could only have watched the same dozen or so "goodnight shows" so much longer before I would have snapped. Now, we've increased the size of our library of kid's shows dramitically. But the feature that Lori and I are having the hardest time adjusting to is the fact that we can pause live TV. It must just be all those years on conditioning - we still wait for commercials if we need to get up for something. And on the very rare occasion that we do remember that we can pause, we both feel so high-tech and futuristic, even though any redneck with a TiVO has been doing this for a long time.
Posted in Electronics
Comments Off on HTPC Follow-Up