
Categories
Archives
- March 2022 (10)
- November 2021 (9)
- October 2021 (10)
- January 2021 (5)
- November 2020 (6)
- August 2020 (2)
- June 2020 (9)
- May 2020 (4)
- April 2020 (7)
- March 2020 (4)
- January 2020 (6)
- October 2019 (4)
- August 2019 (3)
- July 2019 (2)
- June 2019 (4)
- May 2019 (3)
- April 2019 (15)
- February 2019 (1)
- January 2019 (5)
- November 2018 (8)
- August 2018 (10)
- July 2018 (4)
- May 2018 (23)
- April 2018 (4)
- March 2018 (4)
- February 2018 (1)
- January 2018 (5)
- October 2017 (1)
- September 2017 (6)
- July 2017 (8)
- May 2017 (11)
- February 2017 (1)
- January 2017 (6)
- November 2016 (5)
- August 2016 (8)
- June 2016 (9)
- May 2016 (9)
- March 2016 (2)
- December 2015 (7)
- November 2015 (1)
- October 2015 (5)
- August 2015 (8)
- July 2015 (3)
- June 2015 (2)
- May 2015 (14)
- April 2015 (5)
- March 2015 (13)
- February 2015 (5)
- January 2015 (14)
- December 2014 (1)
- November 2014 (9)
- October 2014 (4)
- September 2014 (12)
- August 2014 (13)
- July 2014 (10)
- June 2014 (4)
- May 2014 (9)
- April 2014 (3)
- March 2014 (3)
- February 2014 (7)
- January 2014 (2)
- December 2013 (2)
- November 2013 (4)
- October 2013 (12)
- September 2013 (14)
- August 2013 (10)
- July 2013 (6)
- June 2013 (11)
- May 2013 (12)
- April 2013 (1)
- March 2013 (6)
- February 2013 (7)
- January 2013 (4)
- December 2012 (6)
- November 2012 (4)
- October 2012 (2)
- September 2012 (5)
- July 2012 (8)
- June 2012 (3)
- May 2012 (12)
- April 2012 (4)
- March 2012 (7)
- February 2012 (4)
- January 2012 (1)
- December 2011 (9)
- November 2011 (10)
- October 2011 (10)
- September 2011 (4)
- August 2011 (8)
- July 2011 (28)
- June 2011 (5)
- May 2011 (7)
- April 2011 (3)
- March 2011 (6)
- February 2011 (10)
- January 2011 (7)
- December 2010 (13)
- November 2010 (10)
- October 2010 (10)
- September 2010 (12)
- August 2010 (4)
- July 2010 (16)
- June 2010 (3)
- May 2010 (7)
- April 2010 (3)
- March 2010 (3)
- February 2010 (12)
- January 2010 (5)
- December 2009 (11)
- November 2009 (14)
- October 2009 (19)
- September 2009 (8)
- August 2009 (15)
- July 2009 (14)
- June 2009 (8)
- May 2009 (6)
- April 2009 (8)
- March 2009 (8)
- February 2009 (11)
- January 2009 (12)
- December 2008 (13)
- November 2008 (23)
- October 2008 (10)
- September 2008 (11)
- August 2008 (13)
- July 2008 (10)
- June 2008 (9)
- May 2008 (6)
- April 2008 (4)
- March 2008 (2)
- January 2008 (3)
- December 2007 (9)
- November 2007 (3)
- October 2007 (3)
- September 2007 (1)
- July 2007 (8)
- June 2007 (11)
- May 2007 (13)
- April 2007 (10)
- March 2007 (15)
- February 2007 (1)
- January 2007 (15)
- December 2006 (8)
- November 2006 (9)
- October 2006 (24)
- September 2006 (4)
- August 2006 (6)
- July 2006 (6)
- June 2006 (8)
- May 2006 (18)
- April 2006 (9)
- March 2006 (8)
- February 2006 (10)
- January 2006 (8)
- December 2005 (8)
- November 2005 (12)
- October 2005 (19)
- September 2005 (13)
- August 2005 (15)
Monthly Archives: March 2018
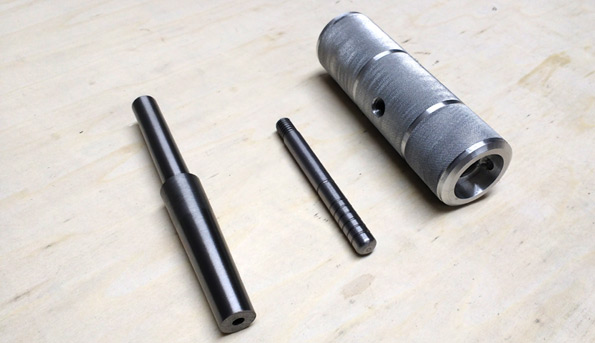
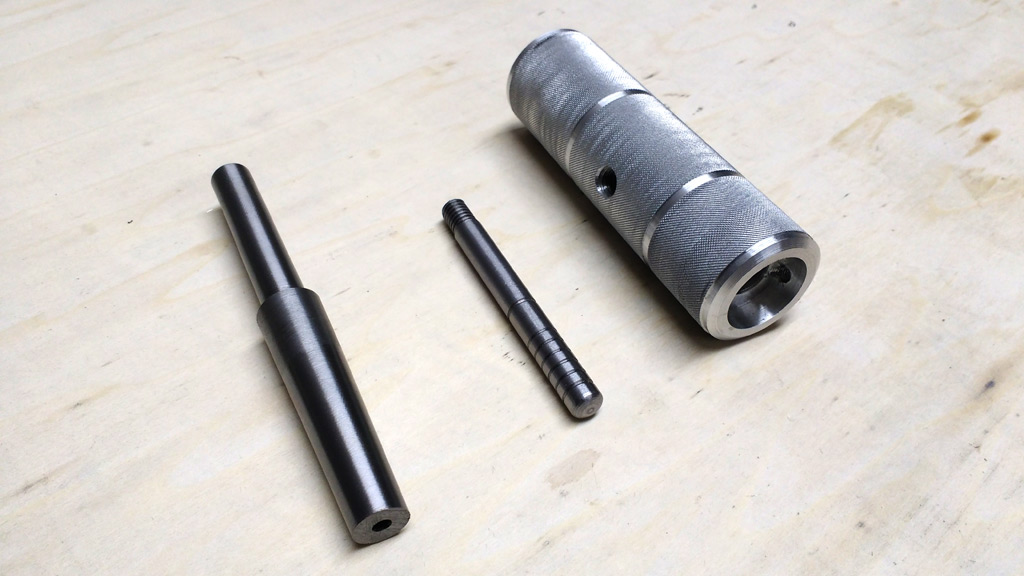
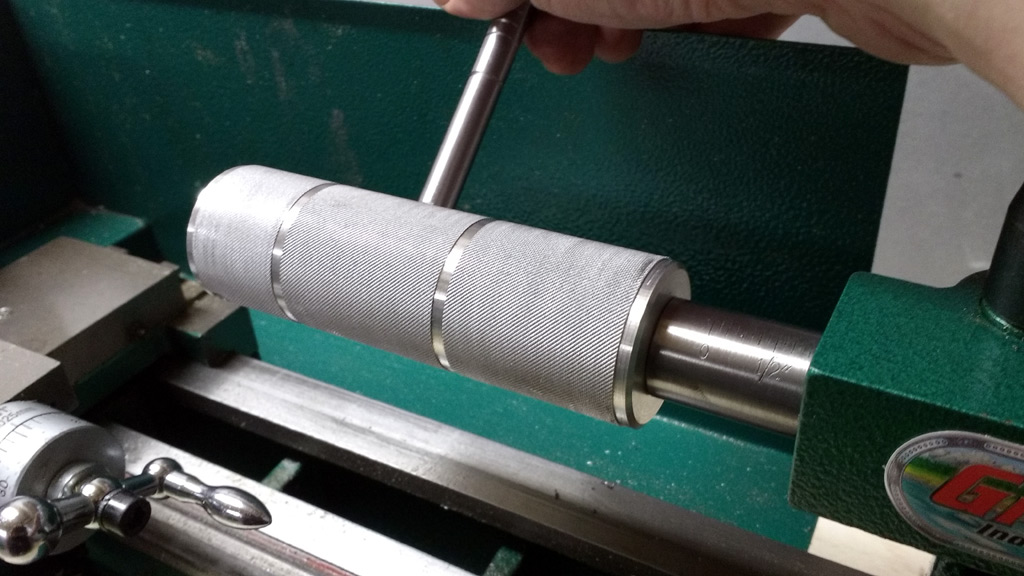
Tailstock Die Holder
One thing I've been doing a lot of lately on the lathe is cutting threads. One trouble with cutting threads with a handheld die holder is keeping the die precisely perpendicular to the work - even something that looks perfect to the eyeball might be a degree or two off, which can be pretty noticeable when the surfaces don't make perfect contact when you screw them together. And it isn't like with wood, where you can force the joint a bit and crush everything together slightly to hide a slightly-off joint. So one solution to this problem is make a die holder that rides on the tailstock, to keep it both perfectly aligned with the axis of the lathe and perpendicular to the shaft being threaded. Over the past couple of weekends I've been making my old tailstock die holder, as you can see below. The tapered shaft on the left mounts in the tailstock, and the die holder (on the right) rides on the narrower half of the shaft (which isn't tapered). The narrow bar in the middle can be screwed into the body of the die holder if a little more torque is required. The recess at the end of the die holder is where the round dies are mounted when in use. The die holder was made from aluminum (to keep it light), and the rest of the parts are made of steel. This was my first experience turning steel. It went better than I expected, but I've got some reading to do to learn what cutting tool edge geometry works best for steel.
Posted in Metal
Comments Off on Tailstock Die Holder
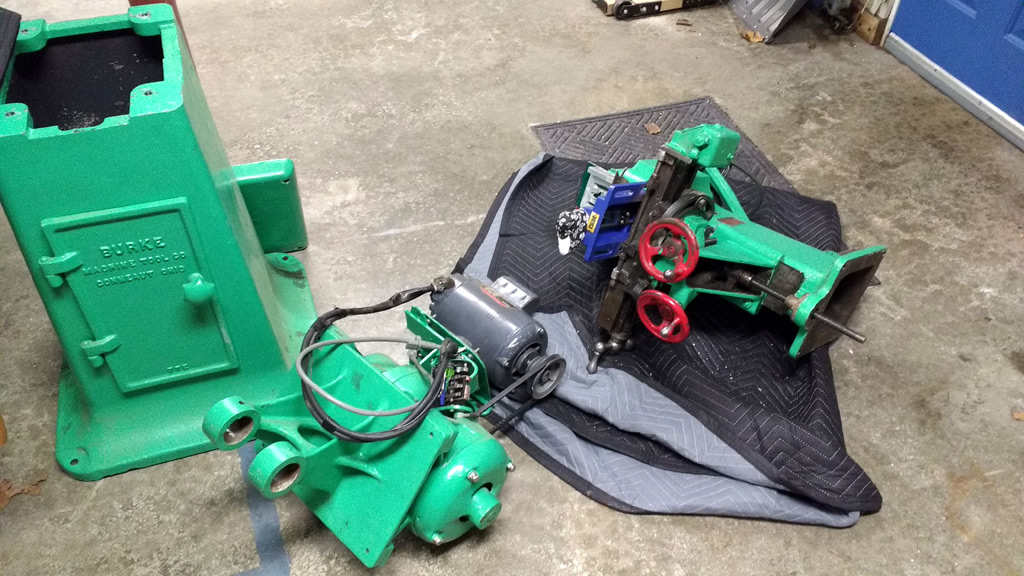
Burke #4 Milling Machine
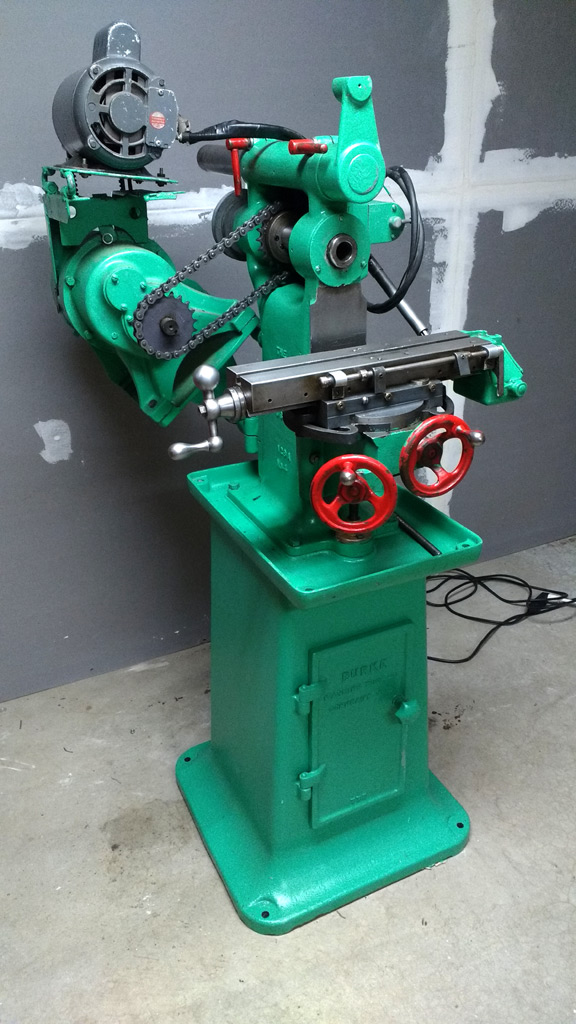
In the back of my head I had been planning to buy a mill sometime next year to grow my burgeoning new hobby - that was the soonest I thought I could justify the expense to myself, and I wanted to give myself time to make sure I would enjoy this work before I spent the money to tool-up the metal shop. But recently, while chatting with a friend in the office about the fact that I am getting interested in metalwork, another coworker mentioned that his mother was trying to figure out what to do with her husband's old milling machine. Apparently he used to restore old outboard boat motors, and had a lightly-used milling machine. I bought it from her for far less that a brand-new (and less capable) mill would have cost me. I got a great machine, and she got a good chunk of her garage back - win-win! It's a Burke #4 horizontal mill, and is quite a beast. It was built in 1942 and is about 600 pounds of American-made cast iron. To get it home, we had to take it apart - but even then, those parts were probably at least a couple of hundred pounds apiece! The van was definitely riding low on the trip back.

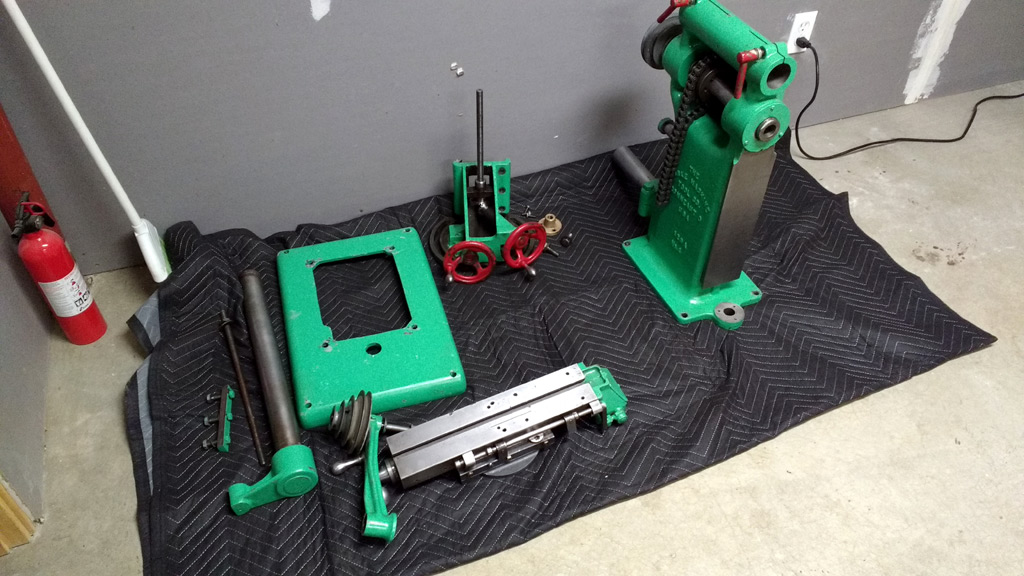
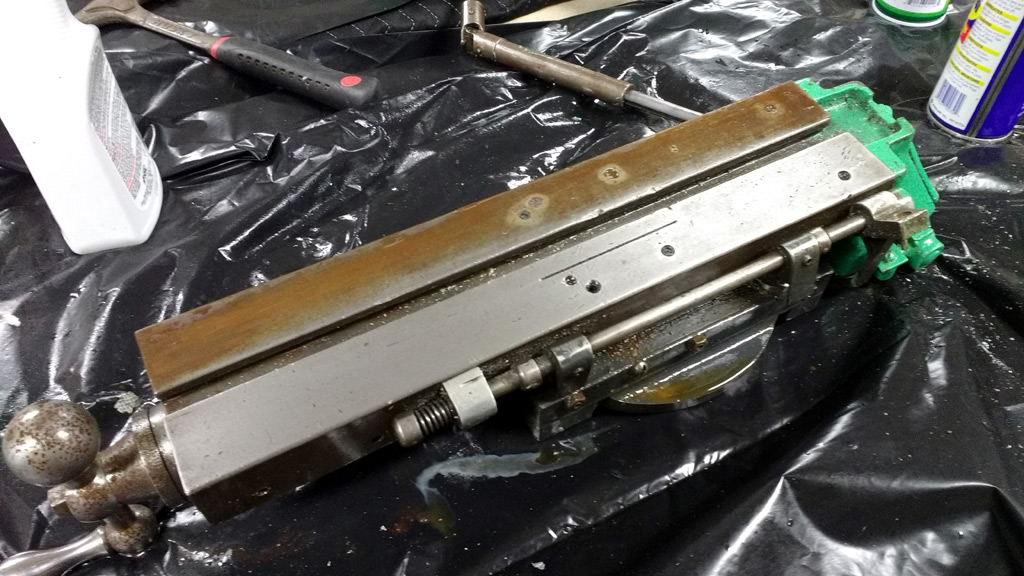
Once I got it home, I took it apart further into assemblies I could work with. Then I scraped and sanded out the rust on any of the metal-to-metal sliding surfaces. As you can see in the photo below, there was a good amount of surface rust that needed to be removed - but there was no deeper pitting - which was great news. Once I got everything apart, cleaned up, and oiled I put it all back together in the room I actually wanted it to end up in - which you can see in the top photo. I got it all wired back up and powered it up to make sure it still worked, and it started right up. I've tested all of the axes, and everything is moving smoothly with minimal backlash. I have yet to try and make any chips with it, but now that I've handled every part of the machine I feel like I've got a very good understanding of how it works and what I can do with it.
Posted in Metal
Comments Off on Burke #4 Milling Machine
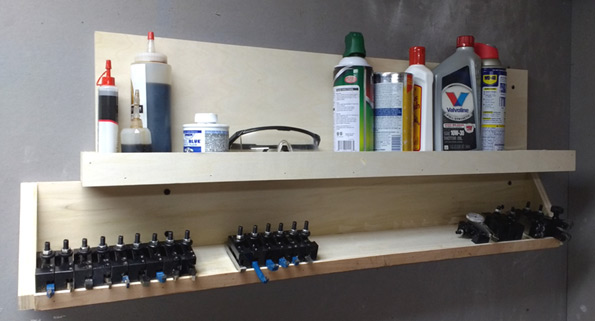
Lathe Shelf
Originally I was keeping all of my cutters in a drawer in the toolbox below the bench. But that became kind of a pain, because I needed to root around in that drawer every time I wanted to try a new cutter. I needed to get them up at eye level, so I could more easily see what I have - especially while I'm a newbie and have no idea which cutter I should be using for any particular operation. :)

Posted in Metal
Comments Off on Lathe Shelf
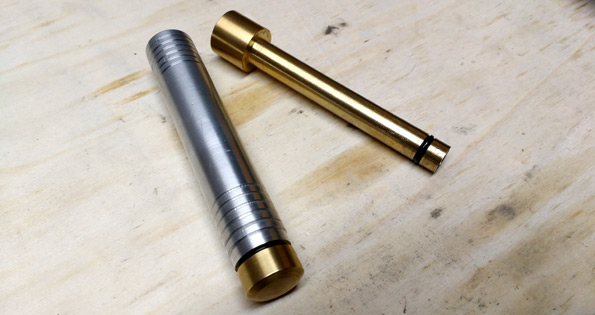
Fire Piston
A couple of weeks ago I made a fire piston on the lathe, but forgot to post about it. For those who haven't heard of a fire piston, they are a way to start a fire without matches using adiabatic compression. When you compress the piston quickly, the air inside heats up enough to ignite a piece of tinder held is a slight recess at the end of the piston. This one was tough because the tolerances had to be just right to prevent air from escaping when the piston was compressed - I actually ended up having to make the piston twice - on the first one, the o-ring didn't quite seal the chamber. For materials, the main part of the handle is aluminum, the handle end cap is brass, and the piston is brass. It can't be seen from the pictures, but the top cap of the piston can be unscrewed to reveal a small storage compartment in the piston - this can be used to store extra tinder (char cloth, specifically).

Posted in Metal
Comments Off on Fire Piston